Teradata page
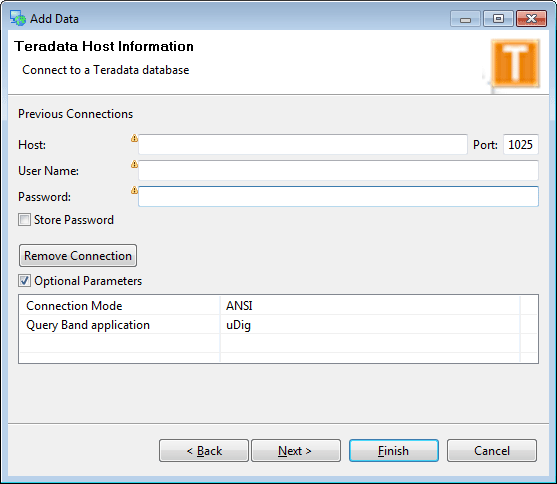
The Teradata page is used to define a connection to a Teradata database.
Note
Teradata database support is not enabled by default and requires the Teradata extension to be installed prior to use. Please see the Teradata page for more details.
Connecting to a Teradata database
From the Layer menu, go to Add...
Select the entry titled Teradata and click Next.
This page displays basic information required to connect to a Teradata database. Fill out the following form.
| Field | Description |
| Host | Host name where the database exists. Can be a URL or IP address. |
| Port | Port number on which to connect to the above host. Default is 1025. |
| Username | User name to use to connect to the database. |
| Password | Password associated with the above user. |
| Store Password | If checked, will store the password for future connections. |
| Remove Connection | Will remove an existing connection from the catalog. |
| Optional Parameters | If checked, will display two new options, listed below. |
Connection Mode Options are one of ANSI or Teradata Query Band application The name of the application to be sent as part of the Teradata query band information. Default is uDig.
Previous connections (if any) will be shown in this dialog as well.
Note
It is recommended that the Teradata database schema is named the same as the Teradata user. Failure to do this may cause problems with feature editing and in some cases may even prevent layers from loading properly.
Press Next to connect to the database.

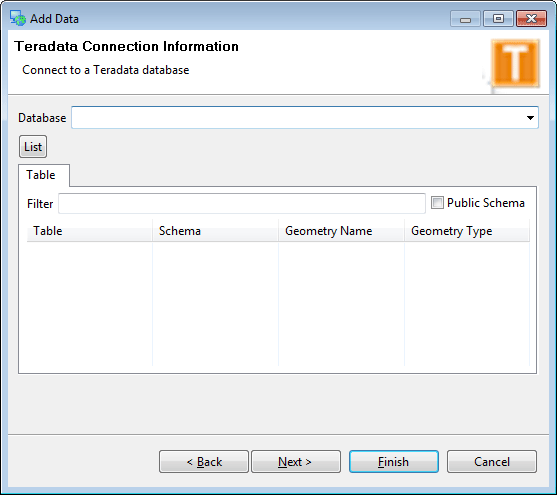
On the next page, details regarding the available databases and layers are displayed. Enter the name of the database you wish to connect to in the Database field and click List.
A list of available spatial tables that can be loaded into uDig will display. Check the box next to each entry for each table to load as a layer, and then click Next.

If you are adding data directly to a map then proceed to the Resource Selection page.
Related concepts
Related reference