Creating new Perspective Example
This example creates a new perspective that is based on combining
Declare new Perspective
Add the following XML snippet to your plugin.xml:
<extension
         point="org.eclipse.ui.perspectives">
      <perspective
            class="tutorial.PerspectiveFactory1"
            id="tutorial.perspective1"
            name="tutorial.perspective1"/>
   </extension>
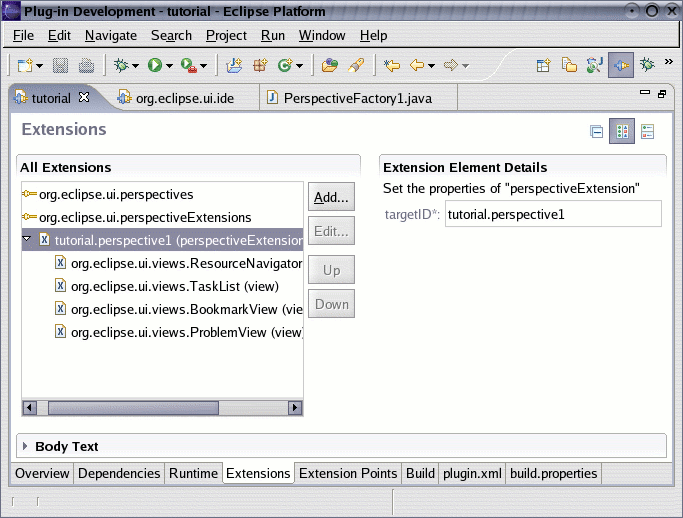
The plugin.xml editor’s extension tab should now be similar to the following (provided you did the last two tutorials):

Create a Perspective Factory class
PerspectiveFactory1
package tutorial;

import org.eclipse.ui.IPageLayout;
import org.eclipse.ui.IPerspectiveFactory;

public class PerspectiveFactory1 implements IPerspectiveFactory {

    public void createInitialLayout(IPageLayout layout) {
        layout.createFolder("left", IPageLayout.LEFT, 0.2f, IPageLayout.ID_EDITOR_AREA);;
        layout.createFolder("right", IPageLayout.RIGHT, 0.6f, IPageLayout.ID_EDITOR_AREA);;
        layout.createFolder("bottom", IPageLayout.BOTTOM, 0.8f, IPageLayout.ID_EDITOR_AREA);;
        layout.createFolder("top", IPageLayout.TOP, 0.6f, IPageLayout.ID_EDITOR_AREA);;
    }

}
Create the Perspective Extensions
See the Extending An Existing Perspective Example tutorial on how to create Perspective extensions.
Add the following xml snippet to the plugin.xml.
<extension
         point="org.eclipse.ui.perspectiveExtensions">
      <perspectiveExtension targetID="tutorial.perspective1">
         <view
               id="org.eclipse.ui.views.ResourceNavigator"
               relationship="stack"
               relative="right"/>
         <view
               id="org.eclipse.ui.views.TaskList"
               relationship="stack"
               relative="top"/>
         <view
               id="org.eclipse.ui.views.BookmarkView"
               relationship="stack"
               relative="left"/>
         <view
               id="org.eclipse.ui.views.ProblemView"
               relationship="stack"
               relative="bottom"/>
      </perspectiveExtension>
   </extension>
Run the application.
Create a new Application Launcher by doing the following:
- Right click on your new plugin and select Run As > Eclipse Application.
- Your view should open up and you can click you button (which does nothing currently).
- Close the intro page.
- Select menu item: Window > Open Perspective > Other
- Select tutorial.perspective1
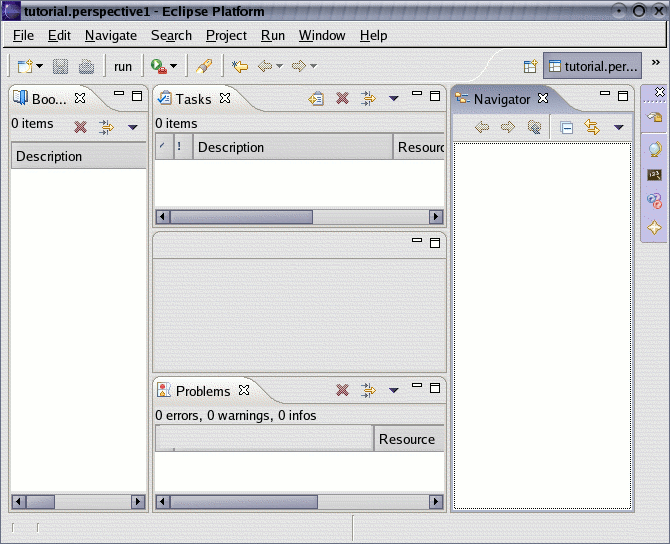
The workbench should now look similar to the following image:
